|
| Webcam Setup |
|
This is a simple page intended to give you an idea of what is involved in setting up a webcam. It is not a comprehensive instructional manual covering exact procedures, cameras, or software programs. You will have to do some research on your own, and when you select your equipment and software, you need to become familiar with them.
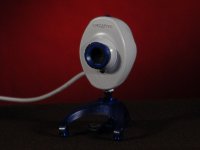 Step 1 Get a web camera
Just about any kind will do. There are many cameras for sale under $50 which are perfectly acceptable for most people. However, usually, you can get a better quality image from the cameras costing more than $75. See my WebCam Review page for a few examples. If you have a video camera, either regular or digital, you can use that with the proper connection to your computer. However, this method is much more complicated and if you don't already have experience with webcams, you should consider purchasing a standard computer webcam to begin with. Once you have the camera, simply install the software that comes with it and you should be ready to go to the next step. Make sure you READ the instructions before plugging in the camera. Some require that you install the drivers first, others require the camera to be plugged in first. If you do it in the wrong order you may not be able to get the camera working at all.
Step 2 Choose a delivery system How are your images going to get to your viewers? There are basically 3 choices. Scroll further down the page to see the details on each of the following options.
Step 2 Option 1Use a serviceThis is by far the simplest system for the beginner. If you already have an Instant Messenger program such as Yahoo, MSN or AOL, then all you need to do is download the webcam software from that service. Many of the newer versions already have the webcam software installed. Check either your Messenger program's help menu or their web site for their webcam software. Install it and follow the instructions. This option works well, but usually gives the poorest picture quality and is reliant on your Messenger host keeping the service available and running smoothly. It also requires anyone who wants to see your camera to have the same service. If you don't have a chat (or IM 'Instant Messenger') program, download one and install it from your favorite service. Step 2 Option 2FTPIf you don't already have a web page, or don't know what FTP is about, this is not the best choice for you to start out with. It can get quite complicated initially. Once set up and running, this method works quite well and is easy to operate. However, this is the system that tends to give you the most trouble getting started, especially if you don't have any experience troubleshooting FTP problems. Check my FTP Setup page for more on File Transfer Protocol. For this option, you will need to obtain a webcam software program. Many webcams come with free webcam software. I use a program called ConquerCam which costs $15. I've tried numerous programs and continue to go back to ConquerCam. ConquerCam appeals to me and is the most flexible for the way I run my system. Many of the other programs are also good. You can also search the web for Webcam Software and should be able to find quite a few. Prices can run from free or just a few dollars to very expensive, depending on its intended purpose. Once installed and connected to your webcam, you need to setup the FTP system within the program. Depending on the software, you may need to build and put in place a web page "wrapper" to show your webcam image. Some webcam programs come with built in web page builders, others don't; it depends on the application. Step 2 Option 3In-house webcam serverThis is the option I use, and I will describe my system further down the page. This method can range from quite simple to extremely complicated depending on several factors. I can't give you specific set-up instructions because every installation is different and there are too many variables to cover without writing an entire book on the subject. Many webcam programs, including WebcamXP and ConquerCam , come with a built-in web server. Once the camera and web server software are activated and configured, all a visitor needs to do is enter your current IP address in their web browser. As long as your computer is connected to the Internet, even with a dial up connection, your camera should now work unless your Internet provider is blocking the default port. Huh? What? IP address? Port blocking? What are you talking about? I said this could get complicated. When you point your web browser to a web site, such as workbenchlab.net, you are actually connecting to a specific computer somewhere that has a unique IP (Internet Protocol) address. IP addresses are a series of numbers with dots between them like this (24.88.111.55). The Internet doesn't understand when you ask for workbenchlab.net, it only understands IP addresses. Being able to use a name like workbenchlab.net, rather than having to remember the number, is a convenience developed to help us humans remember computer addresses easier. This process makes use of a system called DNS (domain name service) which translates the requested name into the proper IP address for you, then your computer can find the website you are asking for. Every computer connected to the Internet has a unique IP address assigned to it. No two computers connected to the Internet at the same time can have the same IP address. Usually you will get a different IP address each time you connect to the Internet, or, if you have high speed Internet, your IP address may change every few days. This is called Dynamic IP addressing. Your IP address is a little like your phone number except it can change every day or two. Imagine what the phone system would be like if everybody's phone number was different each time you tried to call someone. I don't want to confuse the issue here but it is important to know that there are "external" and "internal" IP addresses. If your computer is connected through a router or proxy server, you will most likely have an "internal" IP address. Most "internal" IP addresses are in the range of 192.168.*.* where the * could be anything from 0 through 255. If you are connected directly to the internet, you will be using an "external" IP address. Your "external" IP address is what the world sees you through.
Ports are another thing. A port is a little like a CB radio channel. Software programs that are designed to connect to other programs, listen for connection requests on a specific port. When another program calls on the right port, the program answers and the two programs can then talk to each other. There are some 64,000 software ports available on your computer. The default port for a web page to connect through is port 80. Another common port used by some webcam programs is port 8080. Just about any port can be used, providing another program on your computer isn't already using the same port. However, if you use any port other than the default one, both the webcam program and the visitor's browser must know which port you have chosen. The catch with web servers is that some Internet providers block port 80 so you must use a different port if this is your case. If your camera is working on your own computer, but someone on the outside of your home can't connect to your camera, then port 80 is probably being blocked. The method for configuring a different port depends on your software, so you have to check the instructions. For a visitor to view your webcam, they must first know your external IP address and the port number you are using. For example, let's say my current IP address is 68.100.43.74, and I am using port 8080, the visitor will have to type into the browser address bar, http://68.100.43.74:8080 and press "go" or "enter". Notice the http:// at the beginning and the colon : separating the IP address and the port number, both are required. (Don't bother trying that specific number, you won't get anything). If you are using the default port 80, then the visitor doesn't have to specify the port when they type in your IP address. If you are using a router, you will have to set a fixed IP address on your computer and map the port you want to use through the router to your computer. If you don't know what a router is then you probably don't have one. If you do have a router, check the instructions for Port Mapping, Port Forwarding, Firewall settings, NAT [Network Address Translation], or NAPT [Network Address and Port Translation] (some of the technical terms for this).
About MSN and routersI have noticed a lot of people coming to this page looking for information on using their webcam with MSN messenger and a router. A little research turned up the following point. The new MSN messenger (Version 7) apparently uses UPnP (Universal Plug n' Play) to communicate with the router. If you have had your router for a while, it probably is not UPnP capable. According to the help pages at MSN you will need to purchase a new router that is UPnP enabled. You will also probably have to turn on UPnP in your router. I just bought a new Linksys router myself and noticed the UPnP settings. I have not experimented with this yet, but I will be playing with it sometime soon. I always love new challenges.
Those are the basics for setting up a webcam. If you are just beginning with web cameras, I suggest you start with the first option of using a service, but don't stop there. Spend some time researching what you have learned here. Look through the help areas of your webcam software. Then experiment with your camera and try several web cam software programs.
My system
|
|
|